
I went and looked at the bolts of felt in the department store only to find there was no cream, just bright white, which I thought would look cheap when used en masse for my project. I was feeling frustrated, but ventured over to a table full of white/cream fabrics and on the bottom of the stack I found a cream blanket-type material that was on a really wide bolt -score! I was hoping to have a seamless tree skirt (less work, lol) and a wide fabric helped.
I already had some red felt at home, so I just used that for the applique part. Easy. Using cookie cutters I already had as templates was also easy and handy.
You'll need: (btw-I only spent about 12 Euro on this project, so it's not a bank-breaker folks!)
- wide fabric for the skirt...wide enough to fit the whole circle or enough to make two semi-circles that you'll sew together.
- contrasting fabric for the applique pieces (don't let the word 'applique' throw you) and to create 2-4 ties
- coordinating thread
- pinking shears (or plan to zig-zag stitch the hem of the skirt, which may or may not be the look you're going for)
- cookie cutters or other traceable shape for your applique pieces
- measuring tape
- tree base
So here's how it works: (I'm not including measurements b/c I think tree skirt size is really a matter of personal preference)
Figure out the diameter you need for your tree skirt, adding in seam allowances. I just laid my measuring tape across the base and adjusted one end of the tape to be about where I wanted the tree skirt to come out to (I actually did this when the tree was already in there because I didn't want it to come out from under the tree). Don't forget to figure out the size of the hole you want for the tree to come out! My formula looked something like this (see ridiculously grainy diagram below for illustration):
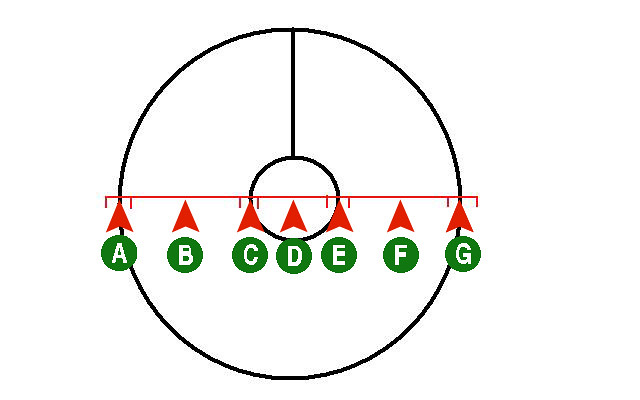
seam allowance (A) + distance to edge of center hole (B)+ seam allowance (C) + diameter of center hole (D) + seam allowance (E) + distance from center hole to edge (F) + seam allowance (G) = fabric diameter needed
If your fabric is wide enough to handle that, awesome. If not, you'll take that number, divide by two and add one more seam allowance to it to create the width you'll need for each semi-circle (you need that extra seam allowance in there to allow you space to sew the two halves together).
I cut my giant circle out with pinking shears and then went around and made notch cuts periodically to help me sew that round hem. Then I drew a straight line and cut in from the edge right to the middle and cut out the center hole for the tree trunk and notched that edge as well.
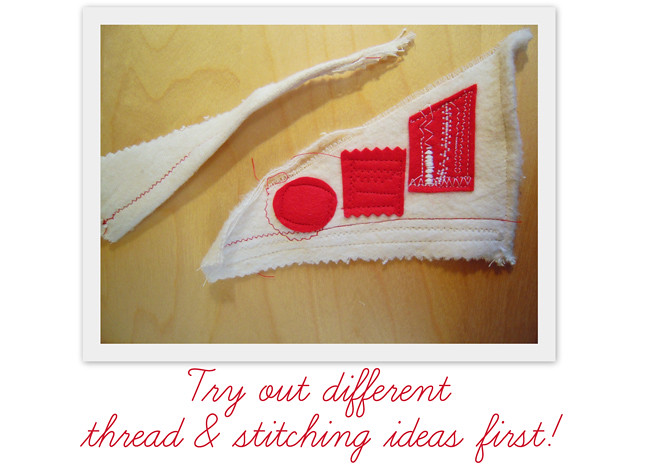
* at this point I grabbed a few scraps and played around with thread color, edging, stitch shape, etc., to see what I liked. I decided to go with straight stitches and cuts, but you may decide you can handle/your fabric is better suited to something different. But it was worth it to try them out first because I went in thinking I would do red stitching and cut out my applique pieces with pinking shears and ended up doing the complete opposite after the test run!
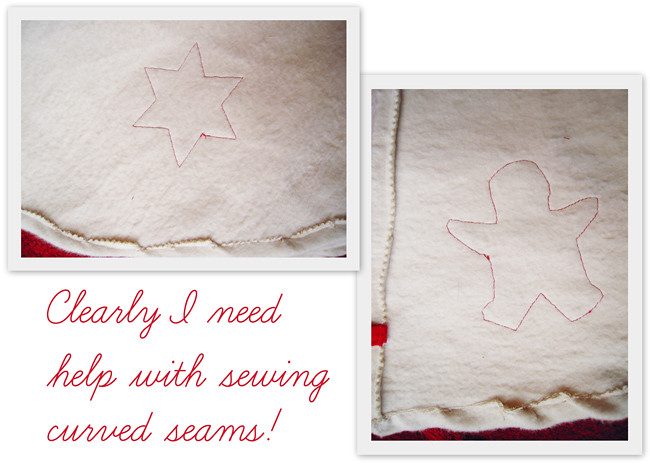
Then you sew the edges up. I used a half inch seam allowance because my fabric was so thick and I wanted it to stay put. Round seams are really hard for me, so I was glad I'd used thread that matched my fabric; my mistakes are only visible when you're up close, phew! I also started with that inner circle seam to get a little practice so beginner's mistakes wouldn't be so visible -obviously this didn't help me much, I blame speed (back to craft goal #1)
Before I sewed the edges of my skirt opening, I folded a few strips of felt in half and sewed them lengthwise to make ties (mine ended up being 1"wide x 9"long each, which was just barely enough to make a nice bow). Felt ties work here because we only tie them once a year, right? I don't think they'd hold up so well on most projects. Then I pinned the ties on top of the hem (the underside of the skirt) and just went over them twice when I did that section of the skirt opening edge. Again, we only tie them once a year, so I wasn't going for eternal durability in how I attached the ties.
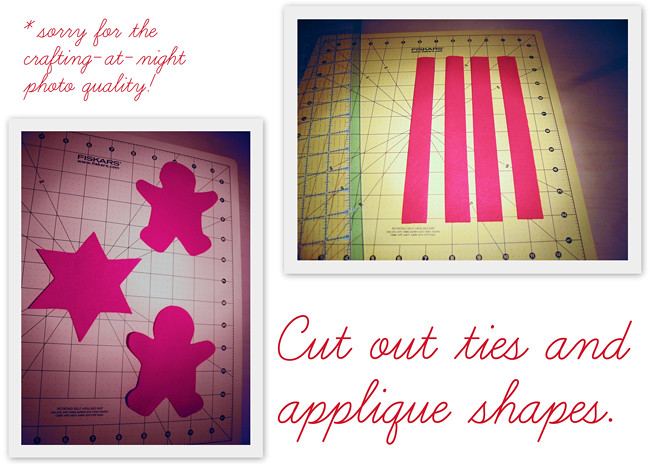
Then you give yourself a break and do something fun, namely trace and cut your applique shapes out of your other fabric (mine was the same red felt I used for the ties). As I was cutting out my gingerbread men shapes I realized how 'fun' they were going to be to sew on...all those curves....blah! I have to say the stars were fine, but I was glad I didn't use a tree shape - too many points!
Place, pin, and then sew on your shapes. I started at the back (by the skirt opening) so if I really messed up in the beginning it wouldn't show as badly back there, ha! I was still doing this skirt the week before Christmas, so I wasn't going to make time for the seam ripper, it was do or die! My suspicions about the gingerbread men were correct: they were stinkin' hard to sew on! I was wishing I had a clear presser foot or some kind of rear view mirror, but you know, it worked. It forced me to slow down, which made them come out way better - this is why I have a renewed commitment to my 2011 goal to slow down on the sewing machine!
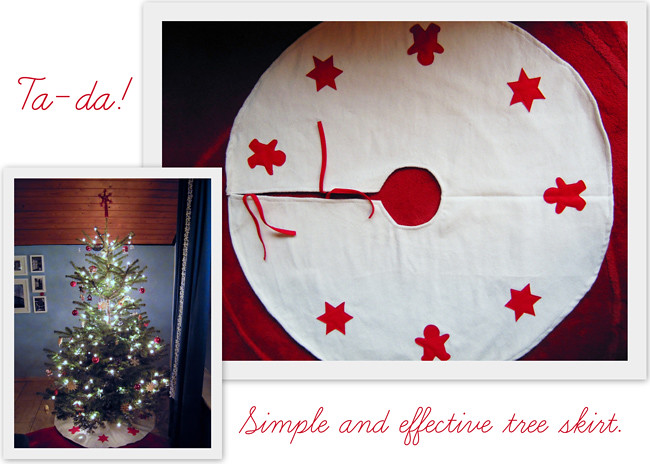
Then, rejoice! You are finished! You can put it under the tree just in time to cover it all up with presents so you don't see it! Or, if you planned ahead, you get to enjoy it for a while before you cover it up. Seriously though, I love my tree skirt and so does my husband! After New Years, when our tree finally started to die and droop at the bottom, he got all bummed because it was hiding our lovely tree skirt; isn't he awesome?
I hope this tutorial will help somebody out...next year! It's definitely a do-able project for a beginner and I'd say in total it took me around one afternoon to do it. I even squeezed in a few phone calls (on speaker) while I did my cutting and pinning.
4 comments :
Wonderful tutorial and final project. I am in a need of skirt as well, so I have bookmarked this for next year. Usually, I just wrap a bunch of burlap around the base, but I think I want something different next year.
I love the materials - they go so perfectly with your red pom-poms. I'm really impressed by how quickly you pulled this together! I am definitely bookmarking this one for next year. :-)
I love it!! Good for you for just diving in and coming up with a plan and a pattern, no less! Something that might make the applique process a little easier would be "wonder under". It basically glues (via the iron) whatever you are appliqueing onto your fabric (tree skirt) and then there is no shifting when you're sewing them on. Great stuff. You can use it for all kinds of applications.
Love this. Next year I am SO doing this. Thanks for sharing.
Leigha
Post a Comment